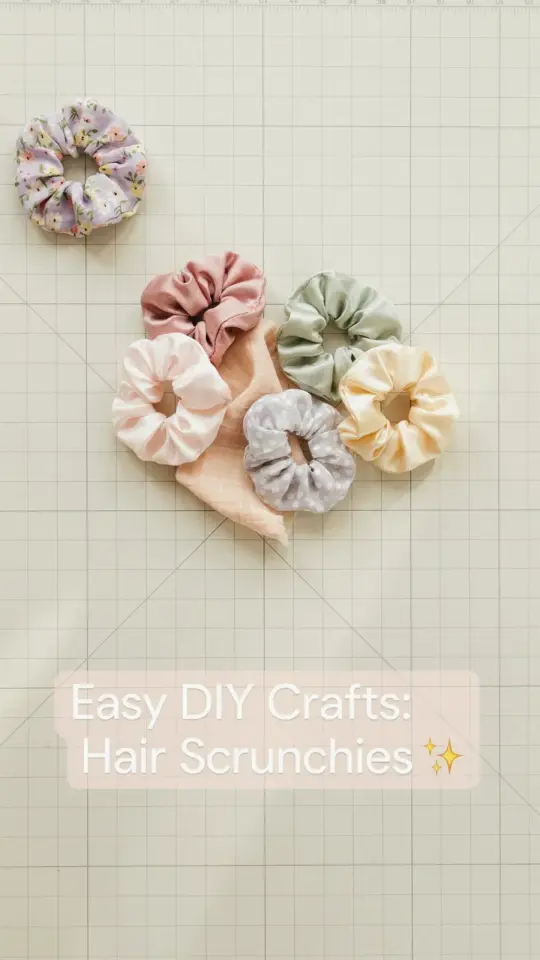
So you’ve got a pile of fabric scraps and no idea what to do with them? This hairscrunchiestutorial is exactly what you need. Honestly, it’s one of those projects that feels almost too easy, but the result is really satisfying. I’ve been sewing for years, and I still make scrunchies when I want a quick win. They take maybe 15 minutes. Less if you’ve done it before. And you can bust out a whole set in different colors while watching a movie. Great for gifts or just treating yourself. Ready to sew? Grab your scraps.
What You’ll Need for This Easy Scrunchie Project
You don’t need much. That’s the beauty of it. Here’s the kit:
- Fabric – a piece about 4 inches by 22 inches. Cotton works best for beginners. Old pillowcases are gold.
- Elastic – 1/4 inch wide, about 8 inches long. You can use a hair tie if you’re in a pinch. Not gonna lie, I’ve done that.
- Sewing machine (or needle and thread if you’re hardcore). A straight stitch is all you need.
- Scissors, a safety pin, maybe a turning tool (a chopstick works fine).
- Iron – optional but helpful for crisp seams.
Look, you don’t need fancy supplies. I’ve used an old t-shirt once. It was a disaster because the fabric stretched too much. Stick with woven fabrics for your first try. We’ll talk about that next.
Choosing the Right Fabric Scraps (and What to Avoid)
Not all fabric scraps are created equal. For a scrunchie that actually holds your hair and doesn’t slide out, you want something with a bit of body. Cotton, linen, silk (if you’re feeling fancy). Avoid anything super stretchy like jersey or knit – it’s a nightmare to turn right side out without distorting the shape. I learned this the hard way. One time I tried making a scrunchie from an old silk shirt I found at a thrift store. The fabric was so slippery that the elastic got stuck halfway through, and I spent twenty minutes swearing and poking it with a chopstick. So yeah. Stick with cotton for now.
Another thing: check the weight. A lightweight quilting cotton is perfect. Denim is way too thick; you’ll never get the seam to lay flat. Corduroy? Fine, but it adds bulk. Velvet? Gorgeous but a pain to cut because the nap shifts. Honestly, just grab that random floral print you bought for a mask project and never used. Perfect.
Cutting Your Fabric to Size: Measurements and Tips
Measurements really matter here. Too short and your scrunchie will be a tight little doughnut. Too long and it’ll flop around. My go-to is a rectangle that’s 4 inches wide and 22 inches long. This gives you a finished scrunchie that’s about 4 to 5 inches in diameter – perfect for a ponytail or a bun. If you have thick hair, go longer: 24 inches. Fine hair? 18 is plenty.
Cut one rectangle. Fold it in half lengthwise with right sides together. Press the fold with an iron – it makes sewing so much easier. Oh, and don’t skip this step. I know it’s tempting to just eyeball it, but an ironed seam stays put while you sew. Trust me.
Sewing the Scrunchie Tube: Step by Step
Ok so you’ve got your fabric folded. Now stitch along the long raw edge (the side opposite the fold) using a 1/4 inch seam allowance. Start at one end, backstitch, and go all the way to the other end. Backstitch again. You now have a long tube, open at both ends and folded at the bottom.
Next, turn that tube right side out. This is where a safety pin or a turning tool comes in. Attach a safety pin to one end of the fabric, push it through the tube, and pull it out the other end. Easy. But sometimes the fabric bunches up and you have to coax it. Use your chopstick to poke it from the inside. One weird tip: if you roll the tube slightly before pulling, it slides through faster. Don’t ask me why. It just does.
Once it’s turned, press the tube flat with the seam centered on one side. You want that seam nice and straight, not twisted. Iron it. Yes, again. I’m a big believer in ironing at every stage. It makes the final result look like you actually know what you’re doing.
Inserting the Elastic: The Tricky Part (But It’s Easy)
Here’s the thing: you need to get that elastic through the tube without losing it inside. Attach a safety pin to one end of your elastic (say, 8 inches long). Feed the safety pin into one open end of the tube and start pushing it through. It’ll bunch up the fabric as you go – that’s normal. Keep pushing and pulling until the pin comes out the other end.
Now you have elastic poking out both sides. Pin the two ends of the elastic together securely. Sew them together with a few tight stitches. I use a zigzag stitch to keep it from slipping. Or you can tie a knot, but a sewn seam is flatter. Not gonna lie, a knot works in a pinch, but it creates a lump you can feel through the fabric. Do it right.
Pull the fabric so it gathers evenly over the elastic. The scrunchie will start to look like a real scrunchie now. Almost there.
Finishing the Seam: How to Close It Properly
You have one open end left. The raw edges of the tube are still exposed. Fold each raw edge inward by about 1/4 inch. Then tuck one end into the other – like a sleeve. Overlap them by maybe half an inch. Pin it in place. This is the ugliest part of the process because the fabric is all gathered and the elastic is hiding inside.
Now stitch across that overlapped section by hand or machine. Hand stitching is more invisible, but a machine stitch is faster. I usually topstitch very close to the edge, right through the gathered fabric. It’s not perfect, but nobody’s going to inspect your scrunchie that closely. (Unless you’re giving it as a gift to a seamstress. Then maybe hand stitch.)
A final tip: give the whole scrunchie a quick press with the iron to flatten the seam. Then fluff it out. And you’re done. Seriously. That’s it.
Customize Your Scrunchies: Ideas for Prints, Velvet, and More
Once you’ve got the basic technique down, the world opens up. You can make scrunchies from any fabric scrap – fat quarters from quilt projects, old button-down shirts, even linen napkins. Velvet scrunchies are trendy, but velvet shifts a lot when you cut it. Use a rotary cutter instead of scissors. Trust me on this.
Another idea: mix two fabrics. Sew a strip of satin on one side and cotton on the other. It looks fancy. Or add a little ribbon tag. Or make mini scrunchies for young kids using shorter fabric (12 inches). I once made a whole set for a friend’s birthday using only scraps from her old dresses. She cried. Not because of the scrunchies, but because she recognized the fabric from a dress her grandmother gave her. Anyway. Point is, this project is a great way to use up fabric scraps and make something personal.
And if you’re feeling lazy – which I often am – you can even skip the ironing. It’ll be a little wrinkled but still functional. Not everything has to be perfect.
So there you go. Make a few. Make a dozen. They make great last-minute gifts or stocking stuffers. And honestly, you’ll feel so productive when you turn that sad pile of fabric scraps into a colorful set of scrunchies. Ready to try it? Grab some fabric and go. I’d love to know what colors you pick. Happy sewing!
#hairscrunchiestutorial #easydiycrafts #sewingforbeginners #fabricscraps #diyhairaccessories
Leave a Comment