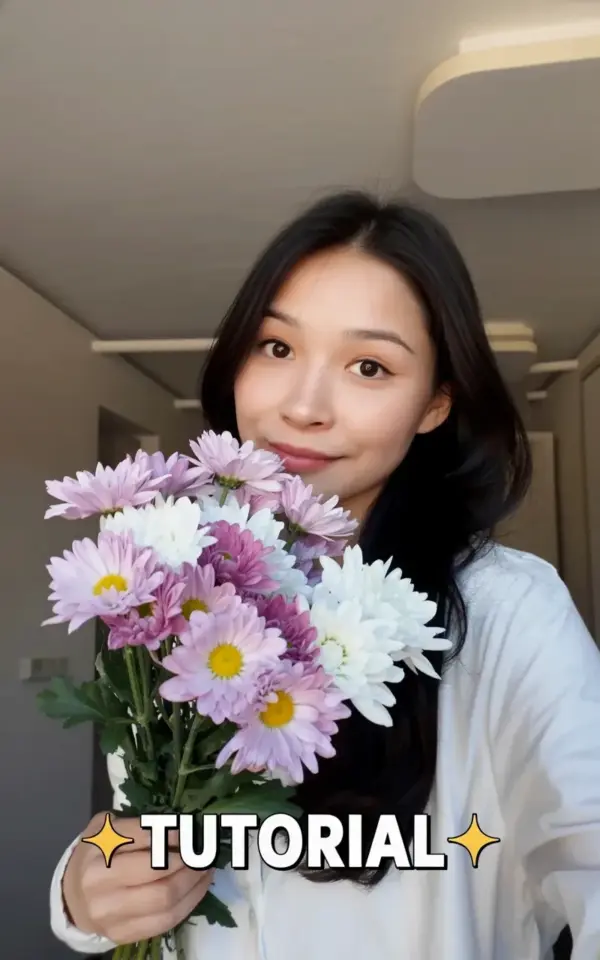
Scroll through any flower enthusiast’s feed and you’ll see a common pattern: chrysanthemums, those round, cheerful blooms, usually end up in tight, formal clusters that look more like a shop display than something you’d actually keep on your kitchen table. But in the photo above, things look different. A young woman with long black hair, dressed in a simple white long-sleeved top, holds a loose gathering of pink, white and light purple chrysanthemums in front of a beige wall. The stems aren’t perfectly aligned, the blooms aren’t packed together, and the soft, even lighting gives the whole scene a warm, unhurried feel. The word TUTORIAL sits at the bottom of the image with little yellow stars around it, which is fitting because this flower arrangement tutorial covers everything you need to recreate the look at home.
Mistake 1: Treating mums like they need to be perfect
The biggest mistake I see in DIY bouquet projects is the urge to make every bloom sit in perfect symmetry. Mums have such full, rounded heads that people instinctively line them up in neat rows, the way you’d display apples at a market stall. That approach works if you’re building a formal centerpiece for a wedding, but it completely kills the relaxed charm that makes this flower so special.
Instead, think about how mums grow in a garden. They come up in loose clusters, some blooms slightly higher, some tipping to the side, some opening at different speeds. Recreate that natural unevenness and you’re already halfway to a natural flower arrangement.
Gather your supplies before you touch a single stem
One reason DIY bouquet efforts go wrong is that people start snipping before they have the basics ready. You don’t need a florist’s studio for this, just a clean bucket or vase, sharp scissors or garden shears, and a little counter space.
Here’s the full list:
- Fresh mums in pink, white and light purple, about 10 to 12 stems total
- Clean, room temperature water in a bucket or tall vase
- Sharp scissors or pruning shears that actually cut cleanly
- A rubber band or green floral tape to secure the stems
- Wrapping paper or a simple vase, depending on where the bouquet will live
That’s it. No foam, no wire, no fancy mechanics. The loose, natural style comes from how you handle the stems, not from expensive equipment.
How to cut the stems so the blooms drink properly
Cutting stems at the wrong angle is a classic floristry tip that people ignore until their flowers start drooping. Slice each stem at a 45 degree angle, which gives the cut surface more area to absorb water. Do this right before you place the stem in water, because the moment the cut end sits dry, air bubbles form and block the water uptake.
Also, strip off any leaves that would sit below the waterline. Mum leaves are sturdy and handsome, but submerged leaves rot within a day and turn the water cloudy. Keep the upper leaves, they’ll add texture and greenery to the finished bouquet.
Build the bouquet in your hand, not in a vase
Here’s where the loose, natural look actually comes together. Hold the stems in your dominant hand, like you’re holding a big bunch of wildflowers, and add blooms one at a time with your free hand. The trick is to rotate the bouquet slightly with every stem you add, so the flowers spiral around the center instead of stacking into a flat fan.
Start with a few of the light purple mums in the middle, then work the pink and white ones around them. Let some blooms sit higher and allow a couple to dip lower. Resist the urge to even everything out at the end, that unevenness is exactly what makes it look hand-gathered and fresh.
Fluff the blooms: the step everyone forgets
Here’s the part that really changes the final look. Chrysanthemums have petals that naturally press together when they’re packed tightly, but they’ll bounce outward if you give them a little encouragement. Gently cup each bloom from below and push the petals upward with your fingers, like you’re ruffling a kitten’s fur.
This fluffing step is the difference between a bouquet that looks stiff and one that looks airy and abundant. You’ll see the pink, white and light purple petals open up, the bouquet will suddenly look twice as full, and the whole arrangement will relax into that cozy, indoor flower arrangement vibe you were aiming for.
Wrap it gently or drop it in a vase, then step back
Once you’re happy with the shape, secure the stems with a rubber band or a piece of floral tape. From here you have two good options: leave them in the hand-tied bundle wrapped in kraft paper, or trim the bottoms evenly and place the whole arrangement in a low ceramic vase.
If you go the vase route, keep the stems long enough that the blooms sit just above the rim. This lets the natural flower arrangement feel like it’s growing out of the vase, not squatting in it. Step back for a moment, tilt your head, and adjust one or two stems if something looks off.
Where to put the finished chrysanthemum bouquet
This is a small detail, but it changes the whole mood of the room. Put the bouquet somewhere you’ll actually see it during the day,
Leave a Comment