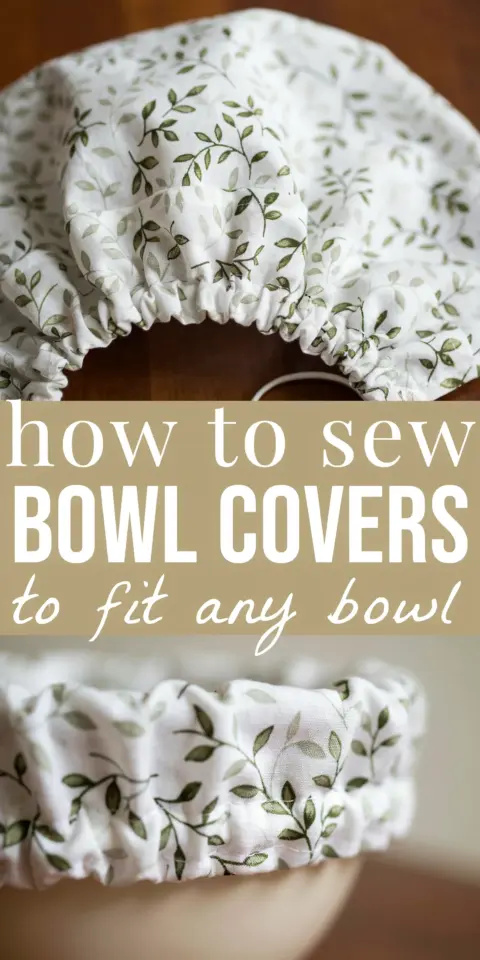
If you have ever wished for a simple way to keep leftovers fresh without reaching for plastic wrap, sewing bowl covers is the answer. This easy DIY tutorial shows you how to make reusable kitchen covers that fit your favorite bowls, reduce waste, and look cute on the counter. I have tested half a dozen styles over the years, and each one has its own charm. Whether you are new to the craft or a seasoned stitcher, these ideas will help you create covers that actually get used. Let me walk you through six distinct themes, each with a practical twist.
Classic Elasticized Bowl Cover Pattern for Beginners
The most popular version, and the one I recommend for anyone trying a bowl cover pattern for the first time, uses a simple elastic casing. You cut a circle of cotton fabric a few inches larger than the bowl rim, then sew a narrow tunnel around the edge and thread elastic through. The result stretches snugly over the bowl.
For a 6-inch bowl, I cut an 11-inch circle. Fold the edge over by 1/4 inch, then another 3/4 inch to create the casing. Leave a 1-inch opening to insert the elastic. Use 1/4-inch elastic cut about 2 inches shorter than the circle circumference. After threading, stitch the ends together and close the opening.
- Fabric choice: Quilting cotton works best for daily use. Avoid thick home decor fabric because it is hard to gather neatly.
- Pro tip: Use a safety pin to guide the elastic through the casing. It saves so much frustration.
- Washing: Toss them in the machine with your dish towels. They get softer with each wash.
Drawstring Bowl Cover Tutorial with a Rustic Look
If you prefer a style that does not rely on elastic (which eventually wears out), try a drawstring bowl cover tutorial. This version uses a fabric tube or ribbon that you pull tight and tie. It feels a bit like a little fabric hat for your bowl.
Cut your circle as before, but instead of a casing for elastic, you hem the edge with a wider fold to create a channel for cord. I use cotton twill tape or leftover bias binding as the drawstring. Pull it closed, knot the ends, and you are done. The cover sits loosely until you cinch it, which makes it easy to stack bowls in the fridge.
One thing I love about this method is that you can use a contrasting drawstring for a pop of color. A bright orange cord against a navy blue fabric looks fantastic on the counter. The only downside is that small fingers might tug the drawstring loose, but a double knot solves that.
Tie On Bowl Covers for Odd Sized Bowls
Not every bowl in your kitchen is a perfect circle. Some are oval, some have handles, and some are those wide mixing bowls that never fit standard lids. For those, I have a reliable tie on bowl covers solution. Instead of elastic or a drawstring, you sew several fabric ties around the perimeter of the cover.
Cut the fabric to roughly match the shape of the bowl, but add an extra 2 inches all around. Then sew six to eight strips of fabric (or ribbon) along the edge. Place the cover over the bowl, cross the ties over the bottom, and knot them tightly. It looks like a little gift wrap for your food.
This style is especially good for proofing bread dough. The cover stays secure even if the bowl gets jostled, and the ties can be adjusted to fit different bowls in the same household. I keep a set of three covers with varying tie lengths for my odd collection of pottery bowls.
Reversible Covers with Two Fabrics for Quick Style Changes
Why make one cover when you can flip it inside out and get a whole new look? Reversible covers are a favorite of mine because they double your options with minimal extra work. You cut two circles of contrasting fabric, place them right sides together, sew around the edge with a gap, turn them right side out, and topstitch. Then add the elastic or drawstring as usual.
I use a cheerful floral on one side and a solid linen on the other. When the floral starts to show stains, I flip it to the linen side until I do laundry. It is also a great way to use up fat quarters from your stash. Just be mindful that the two layers add a bit of weight, so make the circle slightly larger to accommodate the extra fabric.
- Best combos
#SewingBowlCovers #DIYKitchenCrafts #ReusableCovers #SewingTutorial #BowlCoverPattern
Leave a Comment