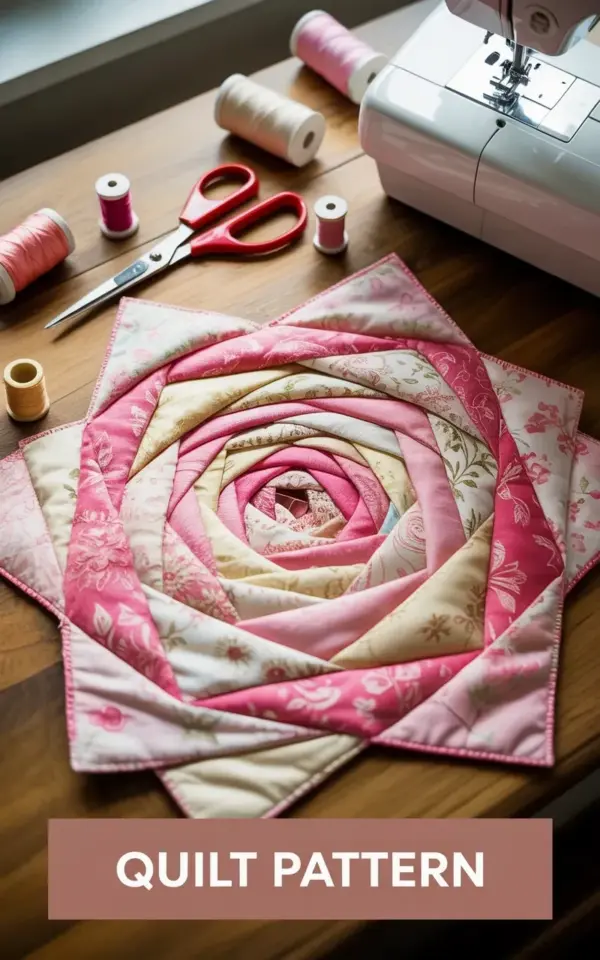
I was halfway through a rose quilt pattern when the seam allowance problem hit me. The pink and cream petals were spiraling exactly like the photo on my phone, and then I noticed my cutting mat had shifted. That’s when I realized I’d been trimming my vintage fabric pieces without adding even a quarter inch. The rose quilt looked so soft and romantic in the dreamy Instagram lighting, but those tight spiral petals have zero patience for sloppy math.
Why That Seam Allowance Matters More Than You Think
Look, seam allowance sounds like basic stuff. Every quilter knows to add it. But with a rose quilt pattern, the petals curve and overlap in a way that makes a quarter inch feel like a mile. I trimmed my first set of pink and cream fabric pieces too small, and the whole flower started puckering.
Here’s the thing: a rose block is not a simple patchwork square. The spiral construction demands exact edges. If you skip the seam allowance, the petals won’t reach the center properly, and the quilt pattern starts looking like a wilted cabbage instead of a rose. I had to unpick three seams and recut everything. Not fun.
So before you even touch your rotary cutter, double-check your pattern instructions. Some modern quilt patterns include seam allowance in the templates, but many vintage-inspired ones don’t. That’s a recipe for disaster if you’re working with old floral fabric that’s already fraying.
How I Almost Ruined My Rose Quilt (and What Saved It)
Ok so, I was sitting at my wooden table with red-handled scissors, a pile of spools in pink and cream, and a white sewing machine that honestly needs a good cleaning. The sun was coming through the window, and I felt so crafty and calm. Therapy, right? Then I cut the center petal wrong.
The pattern called for a 1/4 inch seam allowance, but I’d read it as 1/8 because the print was tiny and faded. I only noticed when I tested the fit of the two inner petals. They overlapped by a hair, not enough to sew a strong seam. My heart sank.
What saved me was a simple trick: I traced the template onto a scrap of cardboard, added the seam allowance with a ruler, and cut a fresh plastic template. That gave me a stable guide for every petal. It took ten extra minutes, but it turned a frustrating evening into a smooth sewing session.
Choosing Vintage Fabric for a Rose Block That Lies Flat
Vintage fabric is gorgeous, but it’s also unpredictable. Some of those old florals have a looser weave that stretches when you, well, look at them. And lace details can make the block even trickier to keep flat. I love that shabby chic aesthetic, but you need to stabilize your fabric a little.
I recommend pressing your vintage fabric with a little spray starch before cutting. It firms up the fibers so they don’t shift while you’re piecing the spiral. Also, wash your fabric gently first. Some vintage pieces have weak spots, and you don’t want a hidden tear popping up in the middle of a petal.
For this rose quilt, I used a mix of pink floral prints, solid cream muslin, and a tiny strip of broderie anglaise lace for the outer edge. The texture is lovely, but it definitely needs a careful hand. If your vintage fabric is too thin, back it with a lightweight interfacing. That keeps the block flat without making it stiff.
The Spiral Petal Trick: Cutting, Pressing, and Pinning
Here’s the trick that made my rose block finally lie flat: I stopped trying to pin every petal individually. Instead, I finger-pressed each seam after sewing, and then I used a teeny dab of fabric glue on the curved edges before pinning. Yes, glue. It sounds lazy, but it works beautifully for spirals.
When you cut your petals, pay attention to the grain. With a rose quilt pattern that has a tight spiral, you want the petals to follow the curve. Cut them on the bias if you can, or at least place the template so the fabric grain runs diagonally. That gives the petals a little give and helps them bend around the center.
- Use a new rotary blade. Dull blades crush vintage fabric.
- Press every seam to one side, normally toward the outer edge.
- Trim dog ears as you go, not all at the end.
- Test one petal fit before sewing the whole spiral.
- Keep your seam ripper close. You’ll need it.
I also gave up on marking every seam line with a pencil. Honestly, that just smeared onto my pale pink fabric. Instead, I used a small ruler and a disappearing ink pen, just a dot at the start and end of each seam. Clean, quick, and it washes out.
Tools I Keep on the Table (Hello, Red-Handled Scissors)
My sewing table is a controlled chaos. The red-handled scissors are the pair I actually use for cutting threads, not fabric, because they’re old but still sharp. The spools of thread in pink and cream are arranged in a little row, and I grab whichever matches the current petal. I have a white sewing machine that I bought secondhand, and it handles the curves beautifully if I go slow.
You don’t need fancy tools for a handmade quilt, but you do need the right ones. A quarter-inch foot is a lifesaver for this rose quilt pattern. It keeps your seam allowance consistent without thinking. Also, a set of curved pins (the little bent ones) are great for holding spiral edges together.
One weird thing that helped me: I put a vinyl mat under my cutting area to stop the vintage fabric from sliding. The wooden table is pretty, but it’s also slippery with smooth cotton. Just a small non-slip surface changes everything.
What to Do If Your Rose Block Won’t Lay Flat
So you’ve sewn the whole rose spiral and it’s still rippling like a potato chip. Not gonna lie, that happened to me on my second block. I’d used a slightly heavier fabric without adjusting my seam allowance, and the petals buckled.
The fix is not to just press it angrily with a hot iron. That might shrink the fabric unevenly. Instead, gently unpick the outer seams, ease the block with your fingers, and re-pin it. Sometimes you just need to trim a little bulk from the seam intersections. The center of a rose block gets thick, and those bulges can make the whole flower pucker.
Also, check your thread tension. I had mine set too high, and it gathered the fabric along the curves. Lowering the tension and shortening my stitch length to about 2.0 mm made a huge difference. The flower started lying flat almost immediately.
A Few More Quilting Tips for Handmade Quilts
This rose quilt pattern taught me to slow down. With vintage fabric, you can’t rush the cutting or the sewing. Every petal deserves attention. I also learned to trust the spiral. It looks wrong halfway through, like a blob of unrelated pieces, but once you finish the final seam, the rose just appears. It’s magic, honestly.
If you’re making a handmade quilt with a floral motif, try to keep your color palette limited. Too many shades of pink and cream can become muddy. I limited myself to three pinks, two creams, and one green lacy accent for the leaves. That kept the block cohesive.
Take breaks. Sewing a tight spiral is intense, and your eyes get tired. I got up, made a cup of tea, and came back with a fresh perspective. That little pause probably saved me from a real mistake.
So, my best advice for tackling a rose quilt pattern: don’t skip the seam allowance, but also don’t skip the patience. It’s a slow, meditative process. And honestly, that’s why I love it. The quiet hour with my pink and cream fabric was pure therapy, even when I had to redo a petal. I’m curious, have you tried a rose block? Got a tip that made it easier? I’d love to hear it. Leave a comment and let’s compare notes.
Leave a Comment