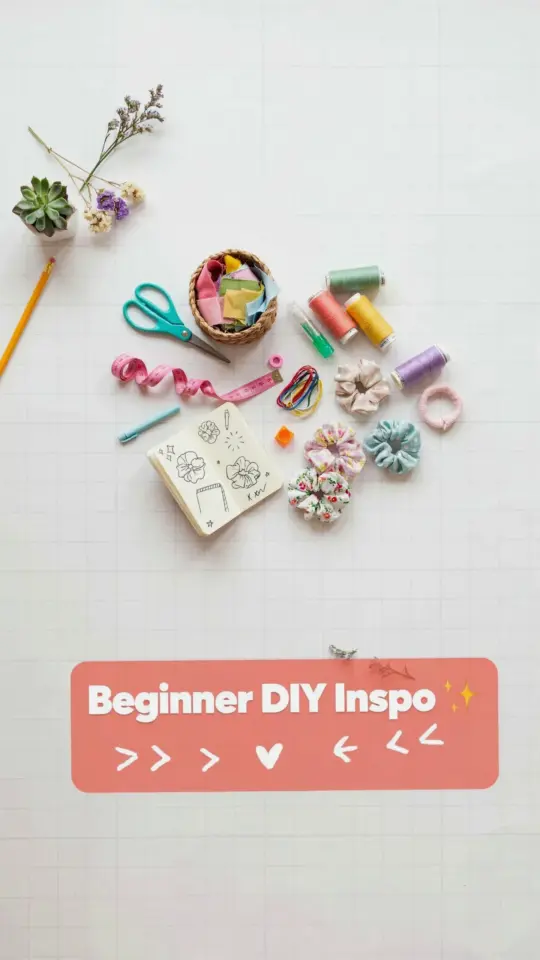
The first time I tried a hairscrunchiestutorial was out of pure frustration. I had a pile of leftover cotton from a dress I never finished, and my sad ponytail needed a lift. I didn’t want to spend money on new fabric or fancy supplies, so I dug through my stash, found a bit of elastic, and gave it a shot. That afternoon I made five scrunchies in under an hour, and I haven’t bought a store-bought one since. This tutorial is built around using what you already have, so even if you are a total beginner, you can create a handful of fun, colorful scrunchies without spending a dime.
Why sewing scrunchies is perfect for using up fabric scraps
I’m a big fan of scrapfabric projects because they feel like winning twice. You clear out your stash, and you get something cute in return. Scrunchies are basically tiny tubes of fabric, so they don’t need much material. A piece that is 4 inches by 20 inches is plenty. That leftover quilting cotton, an old shirt you never wear, or even a worn-out bedsheet can become a scrunchie.
I also love that this project uses very little elastic, maybe 8 inches per scrunchie. If you have a small scrap of elastic from an old pair of pajamas or a craft project, you are set. There is no excuse to buy new supplies for this. It’s one of the most satisfying ways to turn trash into a wearable accessory.
What you need to get started (even if you are a total beginner)
For a beginnersewing project like this, you only need a few items. Do not worry if you don’t own a serger or fancy presser feet. A basic machine with a straight stitch is all you need. Here is my exact list:
- Fabric scraps: cotton, rayon, or any lightweight woven material works best. Avoid thick denim or bulky knits for your first try.
- Elastic: ¼ inch or ½ inch wide. I prefer ¼ inch because it is easier to thread through the tube.
- Thread: any color that blends. I use white for everything because nobody sees the inside.
- Scissors or a rotary cutter and mat.
- A safety pin or a bodkin for turning and threading the elastic.
- A sewing machine (or a needle and thread if you want to hand sew, but that will take longer).
That is genuinely it. No pattern, no special tools. I remember a friend telling me she thought she needed a special elastic foot, which is not true. Save your money for something else.
Step by step: cutting your fabric on a budget
This part is where budgetcrafts really shine. Instead of buying new fabric, just grab your scrap pile and measure out a rectangle. My go‑to size is 4 inches tall by 20 inches long. That gives a nice, full scrunchie with good volume. If your scrap is shorter, you can piece two smaller scraps together, just sew them end to end with a ¼ inch seam allowance.
If your scrap is a weird shape, like a triangle or an old collar, cut it into strips that are roughly 4 inches wide. You do not need perfectly straight lines, but try to keep the width consistent. I have used the leg of an old pair of linen pants, the bottom hem of a shirt, even a cut‑off sleeve. Anything goes as long as it is at least 4 inches wide and 18 to 20 inches long.
One tip from personal experience: wash and iron your scraps first. That way your scrunchie will hold its shape after the first wash. I skipped that step once and ended up with a shrunken, wrinkly mess. Learn from me.
Sewing the tube and turning it right side out
Now for the actual diysewing part. Fold your fabric rectangle in half lengthwise with right sides together. Pin the long raw edge if you want, but I live dangerously and just sew. Use a straight stitch with a ¼ inch seam allowance. Sew from one end to the other, but leave both short ends open. You are making a tube.
Once the long seam is done, press the seam open with your iron. This makes the next step so much easier. Then turn the tube right side out. I use a chopstick or the eraser end of a pencil to push the fabric through. It takes a minute, but be patient. After you turn it, you will have a long, skinny tube with raw edges at both ends. Give it a good press, making sure the seam is centered on one side.
A rookie mistake I made the first time: I sewed the short ends shut by accident. Do not do that. Keep them open so you can feed the elastic later. If you close them, you will have to rip stitches and cry a little.
Inserting elastic without losing your mind
This step used to frustrate me until I found a simple trick. Attach a small safety pin to one end of your elastic (about 8 inches long for a standard scrunchie, or 7 inches for a tighter fit). Feed the safety pin into one open end of the fabric tube and push it through. Scrunch the fabric along the pin as you go, like you are putting a duvet cover on a duvet. It sounds weird, but it works.
When the safety pin comes out the other end, you have both ends of the elastic sticking out. Overlap them by about half an inch and sew them together securely with a zigzag stitch. I sew back and forth three times because nobody wants a popped elastic in their hair. Then pull the fabric over the elastic, so the elastic is hidden inside the tube. The tube will naturally gather up and look ruffled.
If your elastic is too long, the scrunchie will be loose and floppy. If it is too short, it will be tight and hard to put in your hair. I like 7.5 inches for most ponytails, but experiment. You can always cut a new piece if you mess up.
Finishing the last seam (the invisible closure)
Now you have a gathered tube with two raw edges that meet. Tuck one raw edge into the other by about half an inch. Pin it in place. Then hand stitch the opening closed with a ladder stitch or a simple whip stitch. I know hand sewing sounds old‑fashioned, but it makes the closure invisible. If you really want to use the machine, you can topstitch across the seam, but it will show. I prefer the hand sewn finish because it looks professional.
If you are making multiple scrunchies, set up a little assembly line. Sew all the tubes, then turn them all, then thread all the elastic, then finish all the closures. I can make a batch of six in about 45 minutes that way. And they make fantastic gifts for friends, coworkers, or as a fun craft for a birthday party. I gave a set of three to my niece and she wore them daily for months.
How many scrunchies can you make in an hour?
From start to finish, once you hit your rhythm, you can easily sew four to six scrunchies in one hour. If you are a total beginner, plan for two or three while you learn. The best part is that each scrunchie uses so little material that you can crank out a rainbow of colors from a small scrap pile. I often make a handful and store them in a jar on my dresser for quick access.
Think of these as little free gifts for yourself. They add a pop of color to a ponytail, protect your hair from breakage (because you can use soft fabric instead of rough elastic), and they cost basically nothing. I have even made them from an old silk blouse, and that one became my dressy scrunchie for weddings.
I hope this personal experience shows you that you do not need a craft store run to get started. Just grab your scrap fabric, your elastic, and a few minutes of free time. Save this pin for your next craft day, and let me know how many you make.
#hairscrunchiestutorial #diysewing #beginnersewing #budgetcrafts #scrapfabric
Leave a Comment