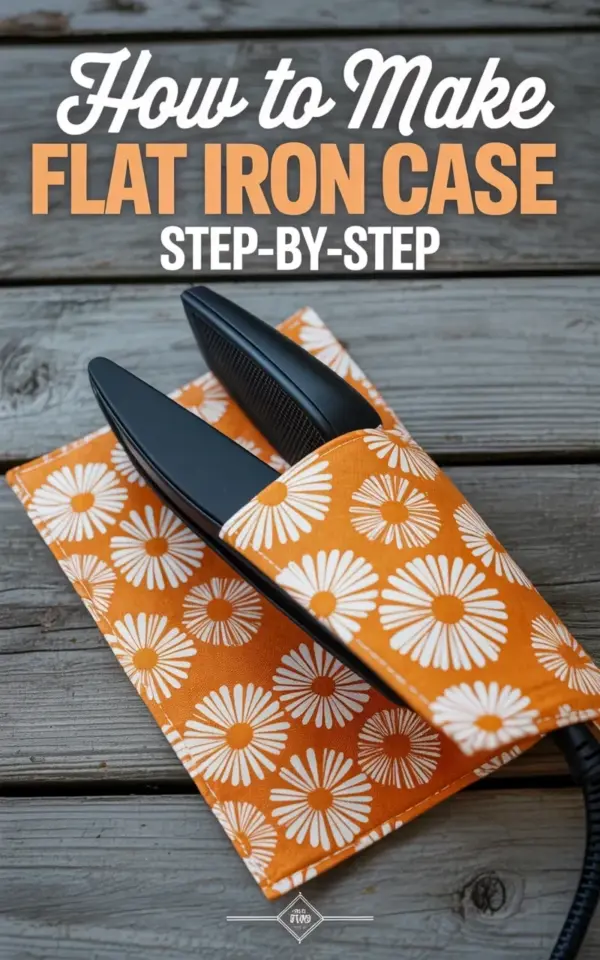
There’s something deeply satisfying about opening your drawer and seeing a neatly folded black flat iron resting inside a bright orange and white daisy case. That cheerful fabric, with its large blooms and dark centers, makes a mundane hair tool look almost like a summer accessory. Protecting your straightener doesn’t have to mean stuffing it into a towel or throwing it loose in a bag. This flat iron case tutorial gives you a practical, cozy way to keep your tool safe, and the sewing steps are simple enough for a confident beginner.
The photo that inspired this post shows the case lying open on a weathered gray wooden plank, the black iron peeking out from its floral hideaway. That visual contrast is exactly why I love this project. The fabric is loud and happy, while the tool it protects is all business. It just works. Let’s walk through the process so you can make one for yourself, maybe with the same daisy fabric or something that fits your own personality.
Why Make Your Own Flat Iron Case Instead of Buying One
Buying a storage pouch is easy, but the ones you find in stores are usually plain black or gray polyester. They work, but they have zero personality. Making your own case lets you choose a fabric that actually makes you smile, like that orange and white daisy print you spotted online and couldn’t stop thinking about.
It’s also a great way to use up fabric from your stash. A flat iron case needs less than half a yard, so it’s perfect for fat quarters or leftover pieces from other projects. Plus, you can customize the size to fit your specific straightener, which is something store-bought options often get wrong. My own iron is on the longer side, and most commercial cases are too short.
As sewing projects go, this one is quick. You can realistically finish it in an hour while watching a show or listening to a podcast. It’s a small win, but honestly, sometimes the small wins are the best ones.
Fabric and Supplies You’ll Need for This Hair Tool Storage Project
Before you start cutting anything, gather your materials. Here’s the thing, you don’t need expensive supplies, just the basics. For the case in the photo, the orange and white daisy fabric is a cotton quilting weight, which works beautifully.
– 1/2 yard of main fabric (quilting cotton or canvas)
– 1/2 yard of cotton batting or fusible fleece
– A piece of ribbon or bias tape for the tie closure
– Basic sewing supplies (thread, scissors, pins)
– Your flat iron for measuring
The batting is the real hero here. It provides that cushioning layer that protects your flat iron from scratches and minor impacts. You could skip it in a pinch, but the final result feels much sturdier with it. If you’re using a thinner fabric, definitely add the batting.
One personal note: I’ve made this with both quilting cotton and canvas. The quilting cotton is easier to work with, but the canvas holds its shape better over time. Your call. Just pick something that makes you happy when you see it.
Measure Your Flat Iron and Cut the Fabric Pieces
Lay your flat iron flat on the cutting mat. Measure the length from the very top of the plates to where the cord attaches. That’s your starting number. Add at least 4 inches to it, 5 is even better, to give yourself wiggle room for the fold-over flap and seams.
The width is pretty standard across most straighteners. Measure the widest part of your iron and add 3 inches. This extra gives you a 1.5 inch seam allowance on each side, which keeps things comfortable without being baggy. A snug fit is fine, but you don’t want it so tight that you have to fight to get the iron inside.
From your main fabric, cut a rectangle that matches these measurements. Cut the batting to the exact same size. You’ll also need a separate piece for the inside pocket where the plates slide in, which is roughly 8 inches by the width of your main piece. The exact dimensions don’t have to be perfect here, eyeballing it a bit is genuinely fine.
Attach the Batting and Create the Protective Inner Pocket
Lay your main fabric piece wrong side up. Place the batting on top of it and pin the layers together. Some fusible fleece just irons on, which is honestly the easiest route if you can find it. With the batting in place, your case is already starting to feel protective and cozy.
Now, take that separate pocket piece. Fold it in half with right sides together so you have a double-layer fabric piece. Sew along two sides, leave one short edge open, then turn it right side out. Press it flat. This pocket will hold the plates, so the double layer adds extra protection against heat transfer to the outside fabric.
Position this pocket on the right side of your main fabric piece. Place it about 2 inches from the bottom and centered horizontally. Pin it in place, then sew around the bottom and sides, leaving the top edge open. This creates a sleeve that the top of your flat iron slides into. The black flat iron in the tutorial photo sits right in this pocket, held securely against the padding.
Sew the Outer Shell of Your Floral Fabric Case
Fold your main fabric piece in half, right sides together, with the pocket on the inside. Pin the edges carefully, making sure the pocket doesn’t shift. You’re creating the main pouch now, so this step needs a bit of patience. Sew around the sides and bottom, leaving the top edge open for now.
Here’s a practical tip: use a 1/2 inch seam allowance to give the edges extra strength. The seams will be inside the case anyway, so you don’t need to worry too much about perfect finishing. Just backstitch at the beginning and end of your sewing line, you absolutely don’t want those seams coming undone later.
Press the seams open after sewing. It’s tempting to skip the iron at this stage, but pressing makes the next step much easier. The fabric will fold more cleanly, and the corners will look sharper.
Turn Everything Right Side Out and Check the Fit
Reach inside the opening and pull everything through the top edge. Go slowly so the seams stay intact, especially in the corners. Once it’s right side out, use a chopstick or a dull pencil to poke out the corners gently. It gives the case a more professional look rather than rounded, sloppy edges.
Now comes the satisfying moment, slide your flat iron into the pocket to test the fit. It should fit snugly but not tightly, with the handle sticking out of the top. If it’s too tight, you’re in trouble and may need to resew with a smaller seam allowance. If it’s too loose, that’s a minor aesthetic problem, but not a functional one.
The case in the photo shows the iron tucked in partially, with the handle poking out. That’s exactly what you want. You can then fold the top flap down over the handle and secure it with your ribbon or tie. Add a button on the outside if you want a little extra security, though the tie is usually plenty.
Finish With a Tie Closure and Edge Details
For the closure, take a piece of ribbon or bias tape about 12 inches long. Attach it to the back of the case, near the fold line, with a few firm stitches. When you fold the flap over the handle, bring the ribbon around the front and tie it in a bow. It’s simple, functional, and adds a sweet detail.
You could also finish the raw top edge of the case with bias binding. Honestly, that’s the more polished route. It covers the seam where you turned the fabric right side out, and it adds a nice contrast color if you want. In the tutorial photo you’ll notice the top edge has a clean, finished look, which is exactly what binding achieves.
If you skip the binding, just fold the raw edge inward about 1/4 inch and topstitch it closed. It’s a bit lighter and less structured, but it still works perfectly. I’ve done both, and it really depends on how “finished” you want the inside of the bag to look.
Your Cozy Little Hair Tool Storage Solution Is Ready
This sewing project does exactly what it promises. It keeps your flat iron protected, it looks incredibly cheerful sitting on your vanity, and it makes a genuinely useful gift for a friend who travels a lot. The daisy fabric might be the star of this version, but the pattern works with any cotton print you love.
I hope you found this flat iron case tutorial easy to follow and maybe even a little fun. Store your straightener safely, keep the cord loosely wrapped, and enjoy opening that case to find a bright pop of orange and white every single time. Save this tutorial for your next craft day, and let me know how yours turns out. Happy sewing.
Leave a Comment