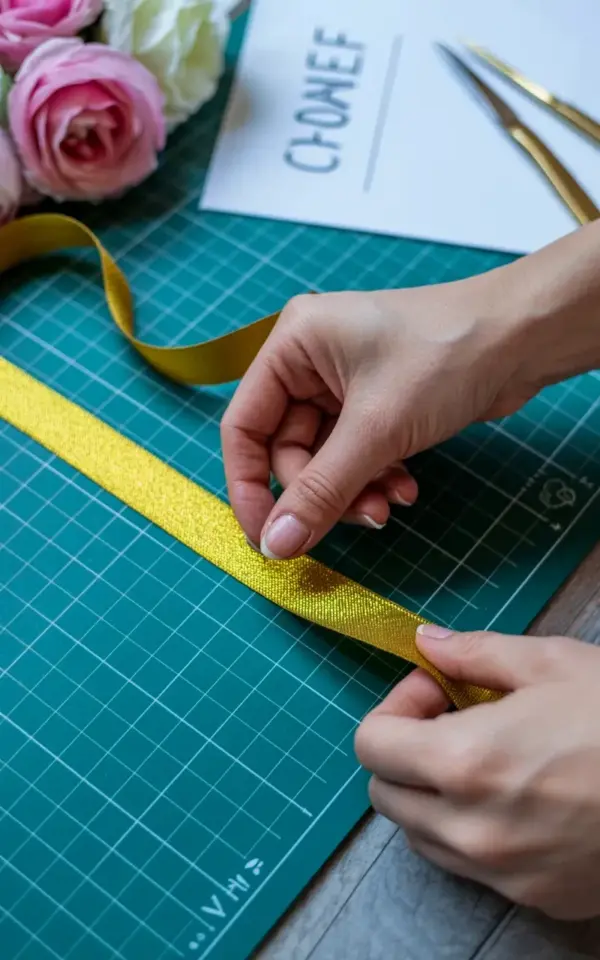
Right now, I’ve got a strip of yellow metallic ribbon stretched across my turquoise cutting mat, and honestly, this might be the most satisfying budget craft I’ve done all month. There are some pink roses sitting nearby in a little vase, just mocking the ribbon with their fancy price tag. But here’s the thing: this budget ribbon craft costs almost nothing, and it looks like it took real skill.
Look, I’m not a professional florist or a gift-wrapping guru. I’m just someone with a drawer full of leftover ribbon and a stubborn refusal to throw any of it away. This yellow metallic ribbon has been sitting around since a birthday party last year, and it finally found its purpose. No fancy tools needed for this one. Just ribbon, scissors, and about ten minutes of your time.
## What You Need for This Cheap Ribbon Craft
Before I walk you through the steps, let me give you the honest supply list. It’s shorter than you think.
– One strip of metallic ribbon (mine is yellow, but any color works)
– A good pair of scissors that actually cut cleanly
– Your hands (seriously, that’s it)
– Optional: a needle and thread if you want the bow to stay perfectly in place
That’s the whole list. I’m not gonna lie, it almost feels like cheating when a craft project has this few supplies. The cutting mat underneath isn’t even necessary, I just use mine because it protects the table and makes me feel like a professional. If you don’t have a cutting mat, a piece of cardboard or even your kitchen counter will work fine.
## How to Make a Ribbon Bow With Scissors and Nothing Else
Ok so here’s the process. It’s simple, but pay attention because the technique matters more than you’d think.
Start by cutting a length of ribbon about 18 to 20 inches long. If you’re making a bigger bow, go longer, but for most gift toppers and wreath accents, 18 inches is a good starting point. Now here’s the part that trips up beginners: hold the ribbon between your thumb and index finger, letting the two ends hang down. Make a loop with the right side, then cross it over the left side. Push one end through the hole underneath, just like you’re tying a basic knot. Pull it tight, but not too tight, because you need room to adjust the loops.
The first time I tried this, my bow looked like a tangled mess. Like, genuinely embarrassing. The trick is in the adjustment step. Once you’ve got that initial knot, gently pull on the loops to make them bigger, and tug the tails to tighten the center. Fluff it out until it looks balanced. That’s it. That’s literally the whole bow-making process.
## Why Metallic Ribbon Makes the Best Budget-Friendly Craft Material
Here’s my opinion, and I’ll die on this hill: metallic ribbon photographs better than almost any other ribbon type. That shimmer catches the light in a way that flat satin or grosgrain just can’t match. When I was working with this yellow piece on my turquoise mat, the contrast was gorgeous. The brightness of the yellow against that teal backdrop, it was giving tropical vacation energy.
Another thing about metallic ribbon? It holds its shape. It’s stiff enough that your bow won’t flop over after an hour. Satin bows go limp, polyester curly ribbon is a nightmare, but metallic ribbon stays crisp. If you’ve got leftover metallic ribbon from old gift bags, this is the perfect way to use it up. No waste, no extra spending, just a cute bow.
## Simple Ribbon Bow Variations for Different Projects
Once you’ve mastered the basic bow, you can mix it up. Same technique, different results.
– Double loop bow: repeat the process with another length of ribbon and stack it on top
– Wide bow: use wider ribbon, around 2 inches, and make the loops bigger
– Wire-edged bow: if your ribbon has wire edges, you can shape the loops into curls and waves
– Mini bow: cut shorter ribbon, around 10 inches, for small gifts or hair clips
My favorite variation is layering two different colors. A yellow metallic bow with a white accent ribbon underneath? That looks like something from a boutique, not something made on a budget. For this particular project though, I kept it simple. Just the yellow ribbon doing its own thing.
## Tips for Working With Shimmery Ribbon on a Cutting Mat
Working on a grid cutting mat honestly helps with symmetry. You can line up your ribbon tails with the grid lines to make sure they’re even. That’s a small tip but it genuinely improves your result. I noticed when I was making this bow, my tails kept coming out uneven until I started checking them against the mat’s markings.
Also, be careful with metallic ribbon when it comes to heat. If you’re using a glue gun near it, keep the glue away from the ribbon surface itself. The metallic coating can melt or bubble if it touches hot glue directly. Use a small dot of glue on the back of the ribbon or wrap a thread around the center instead. Learned that one the hard way, ruined a perfectly good bow on a gift last Christmas.
## Decorating Ideas for Your DIY Metallic Bow
So you’ve got your pretty yellow bow. What now? Here are some practical ways to use it that don’t cost extra money.
If you’re a regular craft person, you probably have cardboard wreath forms or empty picture frames lying around. A bow like this looks adorable glued to a plain wreath. Or pin it to a burlap garland. Or attach it to a gift box with double-sided tape. One time I stuck a matching bow on my desk lamp just for fun. It gave that corner of my desk a little personality, and it cost me nothing.
The pink roses in the background of my workspace are giving me another idea. You could group a few small metallic bows with artificial flowers to make a budget centerpiece. It would look expensive, but the whole thing would cost under five dollars if you use leftover supplies.
## Storing Your Ribbon Stash for Future Budget Crafts
This is the part where I give you advice I should probably follow myself. If you want to keep making cheap crafts, you need to keep your ribbon organized. Otherwise you end up buying the same roll twice, which kind of defeats the whole crafting on a budget thing.
I use a clear plastic bin with a lid. All my ribbon rolls go in there, sorted by color. The scraps go in a smaller zippered pouch. When I want to make a bow, I just open the bin and see what’s there. It saves me money because I know exactly what I own. And it saves me time because I’m not digging through drawers.
## You Don’t Need Expensive Supplies to Make Something Pretty
Honestly, the more crafts I make, the less I believe in buying fancy supplies. Some of my best projects came from a scrap bin and a stubborn attitude. This yellow metallic bow is proof that leftover materials can become something genuinely cute.
If you’re stuck on what to do with your ribbon scraps, just make a bow. Put it on a gift, add it to a wreath, or stick it on your fridge for no reason at all. It takes ten minutes, it costs zero extra dollars, and it makes you feel accomplished. Save this one for your next cheap craft day, and let me know what color ribbon you end up using.
Leave a Comment