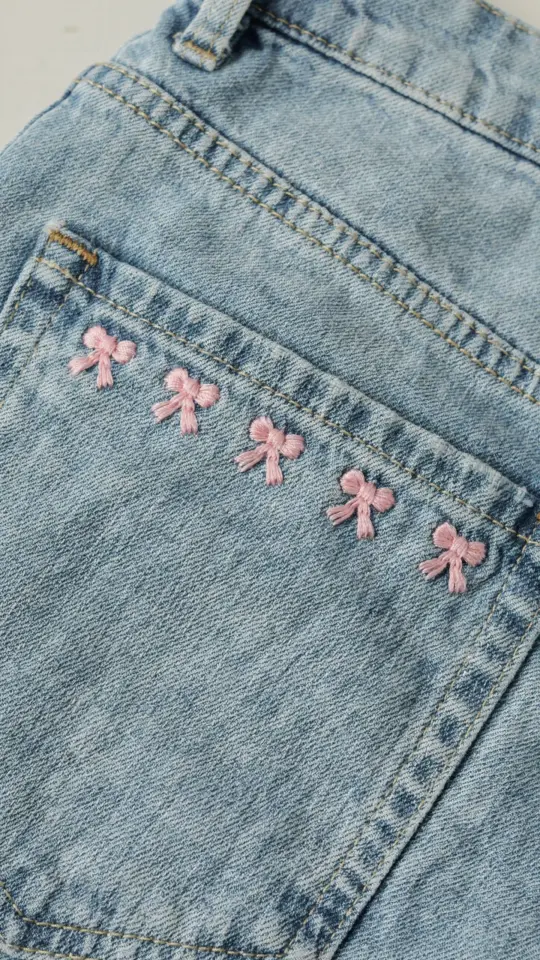
If you have ever wanted to add a sweet, handmade touch to your favorite jeans or denim jacket but felt intimidated by sewing, this little bows on a denim pocket tutorial is for you. I am going to show you how to stitch little bows using the seams that are already there, so you do not need any special skills or expensive tools. In about thirty minutes you can transform a plain pocket into something that looks store bought but feels personal. This is the kind of quick project that builds confidence, and it works beautifully for beginners who just want to try a small sewing idea without pressure.
Materials You Need for Denim Pocket Bows
Gathering supplies is the easiest part. You probably already have most of these at home. If you are missing something, a quick trip to a craft store or a look in your sewing kit will fix that.
- A pair of jeans or a denim jacket with a pocket you want to decorate. Flat front pockets work best, but curved back pockets are fine too.
- Coordinating thread. I use all purpose polyester thread in a color that matches or slightly contrasts with the denim. For light wash jeans, a cream or white thread looks lovely.
- A hand sewing needle. Choose a sharp needle that can go through denim without bending. A size 7 or 8 sharps needle is a good starting point.
- A small pair of scissors. Embroidery scissors are perfect for snipping thread close to the fabric.
- Optional but helpful: a thimble (if your denim is thick), a needle threader, and a seam ripper just in case you want to remove stitches.
That is it. No pattern, no glue, no extra fabric. The bow is formed entirely by stitches you create along the pocket seam.
Choosing the Right Thread and Denim for Your Little Bows
The type of thread you pick affects how your bow looks and how long it lasts. For denim, I recommend cotton wrapped polyester thread because it has a little give and does not snap easily. If you use embroidery floss, separate it into two strands so the stitches are not too bulky. For the denim itself, medium weight jeans or jackets are ideal. Very thick work denim can be tough on your hands, while thin stretch denim might pucker too much. If you are unsure, test a small bow on the inside of the pocket hem first. That way you can see how the thread behaves and adjust your tension before stitching where everyone can see it.
How to Use the Existing Pocket Seams as Your Guide
This technique works because most denim pockets have a visible seam around the edge. That seam is your roadmap. Look at the top edge of the pocket. The seam that attaches the pocket to the jeans is usually a straight or slightly curved line. You will use that seam line as the center of your bow. The bow itself is made by sewing a series of tight stitches across that seam, then pulling them gently to create gathered loops. You do not need to measure anything. Just follow the natural line of the pocket. For a small bow, use a section about one inch long. For a larger bow, use two inches. The existing stitches act like a built in ruler, which is why this method is so forgiving for beginners.
Step by Step: Stitching Your First Little Bow
Let me walk you through the actual sewing so you can see how simple it is. Start by threading your needle and tying a small knot at the end. Insert the needle from the inside of the pocket, coming out right on the seam line at the point where you want the left side of the bow to sit. Take a tiny stitch through the seam line, about one eighth of an inch long. Pull the thread through until the knot catches the inside of the pocket. Now make a series of parallel stitches across the seam, each stitch about one eighth of an inch apart. You want three or four stitches total. Keep them all on the same seam line. When you have stitched across, pull the thread gently. The fabric will gather into loops that form the left side of the bow. Secure the gathers by taking a small stitch through the center and then making a tiny backstitch. Repeat the same process on the right side
#littlebows #denimsewing #beginnerdiy #pockettutorial #sewingideas
Leave a Comment