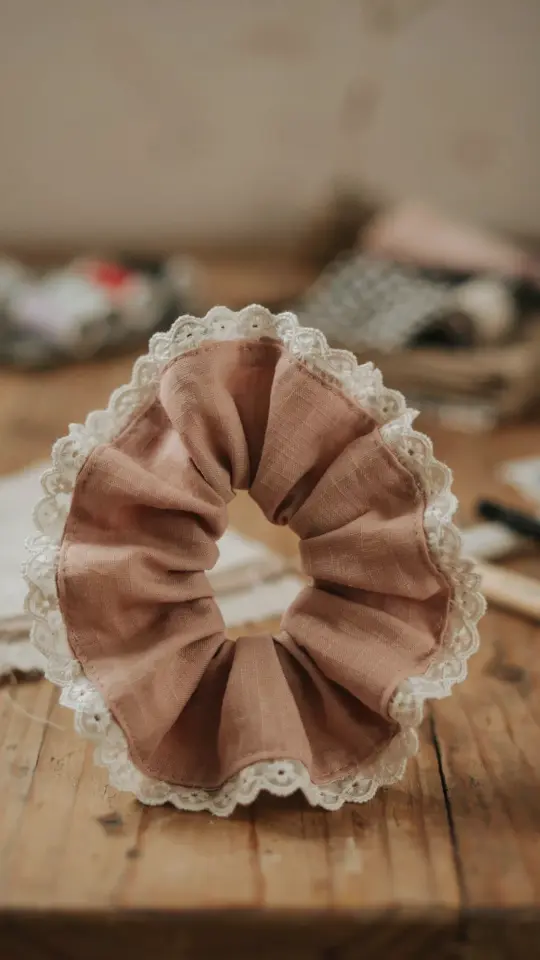
I have a confession: my fabric scrap bin was officially out of control. Stacks of leftover pieces from bigger projects, all too small for garments but too pretty to throw away. That is when I discovered the perfect solution – the fabric scraps scrunchie sewing project. Not only does it use up those odds and ends, but it also gives you a cute, wearable accessory in under fifteen minutes. If you are on a tight budget or just hate wasting materials, this is the project for you. No fancy tools required, just basic sewing skills and a bit of patience.
Why Fabric Scraps Are Perfect for Scrunchies
I used to buy those store-bought scrunchies until I realized how much fabric ends up in the trash. Using scraps means you save money and reduce waste at the same time. Cotton quilter’s cotton, leftover linen, old shirts, even lightweight denim – almost any woven fabric works. The key is to pick something that feels soft against your hair. Stay away from stiff or bulky fabrics like thick upholstery leftovers because they will not gather nicely.
Another bonus: scraps come in endless colors and patterns. You can mix and match to create a whole set of scrunchies without buying new material. I have made matching scrunchies for my nieces using leftover dress fabric, and they love them way more than anything from a store.
Materials You Need for This Easy DIY Hair Accessory
Before you start, gather your supplies. Most of these are already in your sewing box or around your house. Here is what I use for every easy DIY hair accessory:
- Fabric scrap measuring at least 65 cm by 12 cm (or 26 by 5 inches). A yard of fabric can give you several panels.
- Matching thread and a sewing machine (hand sewing works too, but takes longer).
- A safety pin or a bodkin for turning the tube right side out.
- A piece of elastic about 20 cm (8 inches) long and 1 cm (half inch) wide. I reuse elastic from old pajama bottoms or buy a cheap pack.
- Optional: lace trim or ribbon to add detail (I buy lace remnants from the dollar store).
That is it. No expensive notions. If you do not have elastic, you can even cut it from the waistband of worn-out leggings.
How to Cut Your Fabric Panel for the Scrunchie
Cutting the fabric panel for a scrunchie correctly makes the whole project smoother. Measure out a rectangle 65 cm long by 12 cm wide. If your scrap is shorter, simply sew two shorter pieces together along the short ends – no one will see the seam inside the finished scrunchie. I have done that many times when my leftover strips were only 40 cm each.
Press the fabric flat with an iron before cutting. Wrinkles will cause uneven edges, and you want a clean rectangle. Use a rotary cutter and mat if you have one, but scissors work fine. Just take your time to keep the edges straight.
Optional: Stitching Lace Trim Down the Middle
If you want a fancier look, this is the time to add lace. I love how a thin strip of lace changes the whole vibe, making it look like something from a boutique. Fold the fabric rectangle in half lengthwise with wrong sides together, then open it back up so you can see the crease. Place a piece of lace along that center crease. Pin it in place, then stitch down the middle of the lace using a straight stitch.
You can also sew a narrow ribbon or a row of sequins the same way. Just be careful not to stretch the fabric while stitching. I prefer cotton lace because it doesn’t get scratchy against my scalp. And the best part? You can find leftover lace scraps at thrift stores for pennies.
Folding and Stitching the Long Edge: The Key Step
Now for the main assembly. Fold the fabric rectangle in half lengthwise again, this time with right sides together. The lace (if you added it) will be inside the fold. Pin along the long raw edge to keep everything aligned. Using a straight stitch with a 1 cm (3/8 inch) seam allowance, sew from one end to the other. Backstitch at the start and end to secure.
If you are using a very slippery fabric like silk or polyester satin, go slowly and use a few extra pins. I learned the hard way that skipping pins leads to a twisted tube. Also, leave the short ends open – do not sew them shut yet. You need an opening to turn the tube and insert the elastic later.
Leave a Comment