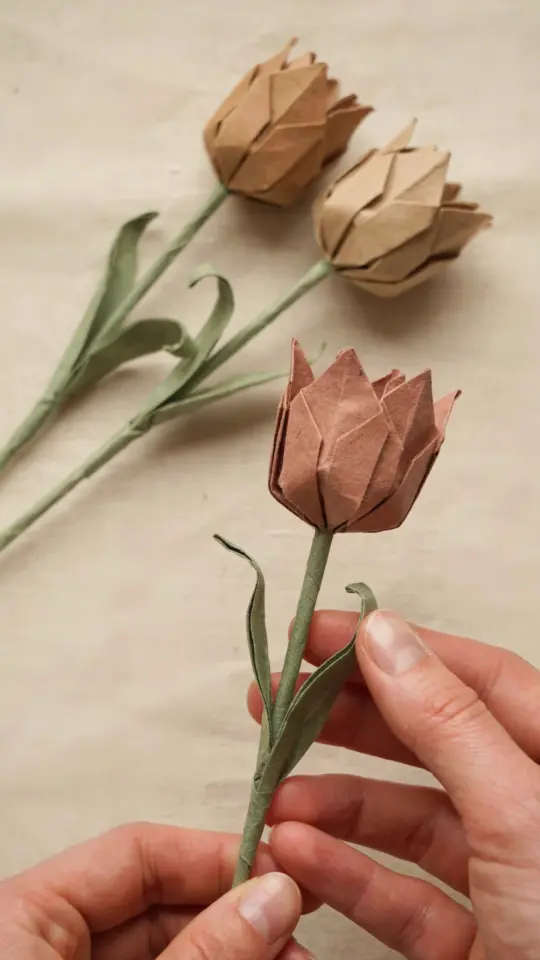
There is something so satisfying about turning a simple square of paper into a beautiful origami tulip. I remember the first time I tried this fold, I was convinced I would end up with a crumpled mess. Instead, I got a sweet little paper flower that sat on my desk for months. That is why I want to share this exact tutorial with you. It uses basic folds, takes about five minutes, and requires no glue or scissors. If you have ever wanted to try origami but felt intimidated, this is the perfect place to start.
Why I Keep Coming Back to This Beginner Origami Tulip Design
I have folded dozens of origami flowers over the years, but this tulip is the one I teach every friend who asks. It only uses a handful of folds, and the result looks genuinely like a real tulip. The shape is simple enough that children can master it, but elegant enough to use as a gift topper or spring centerpiece.
What I love most is that you can finish one tulip in under three minutes once you get the hang of it. That makes it perfect for last minute decorations or for keeping your hands busy while watching a show. Plus, the design naturally holds its shape without needing tape or glue, which feels almost like magic.
Simple Supplies for Your Paper Flower Project
You do not need a craft store trip for this project. Here is what I use every single time:
- One square sheet of origami paper (15 x 15 cm works best, but any square will do). For the tulip head, I prefer a color on one side and white on the other – it adds a nice contrast when the petals open.
- One green square sheet for the stem and leaf. If you only have one sheet, you can cut a strip from a larger piece, but a full square makes folding easier.
- A flat surface like a table or hardcover book. Origami paper creases better on a firm surface than on your lap.
- Your fingers – that is it. No glue, no scissors, no rulers.
I have even used printer paper cut into a square in a pinch. It works fine, though the folds are a bit stiffer. If you are using thicker paper, press down firmly on each crease to get sharp edges.
Step by Step: Folding the Origami Tulip Base
Start with your colored square placed with the colored side facing down. Fold it in half diagonally to make a triangle, then unfold. Repeat with the other diagonal, so you have an X crease. Now fold it in half horizontally, unfold, and repeat vertically. You should have eight crease lines intersecting at the center.
This next part is the trickiest for beginners. Bring the left and right edges of the square toward each other while pressing down the top edge. The paper will collapse into a smaller triangle shape with two flaps on each side. Do not worry if it feels awkward the first time – I had to rewatch a video three times before it clicked. Once you have that triangle, fold the left and right corners of the top layer up to the top point. Flip and repeat on the other side.
Now you have a diamond shape with a gap in the middle. Fold the outer edges of that diamond toward the center line, like closing a book. Flip and repeat. Finally, tuck the bottom points into the little pockets created by those folds. This locks everything together. Blow gently into the hole at the bottom to inflate the
#origamitulip #paperflower #diycrafts #easytutorial #origamiforbeginners
Leave a Comment