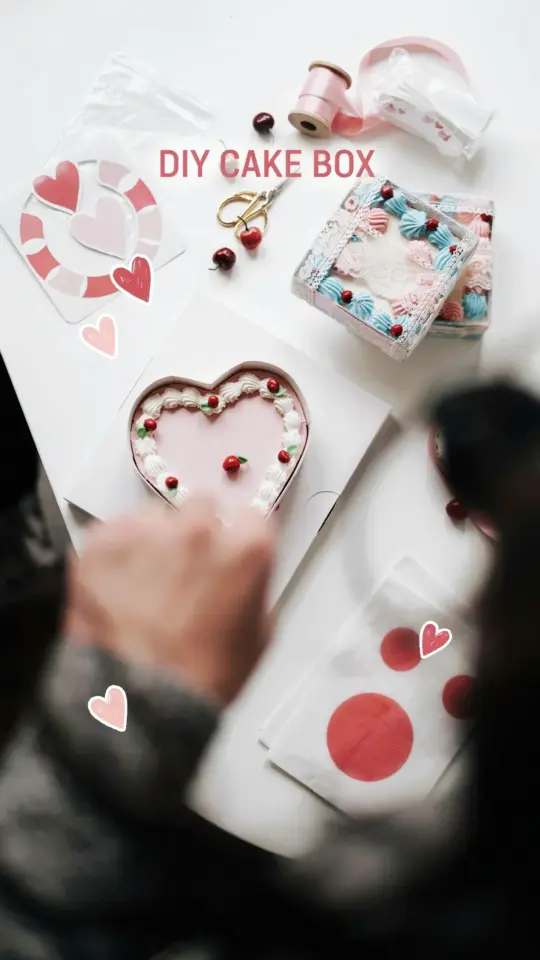
Choosing the Wrong Type of Container
Many beginners grab a random tin or plastic container without thinking about shape and depth. The result is a cake jewelry box that looks lumpy or doesn’t close properly. Stick to a short, wide container with a tight lid. A shallow round tin (like the kind cookies come in) works perfectly. Avoid tall, narrow jars because they look more like a cupcake than a whole cake and they tip over easily. Also, check that the lid sits flush so your fake frosting layer won’t crack when you close it.
Skipping the Base Preparation Step
If you apply paint or clay directly onto a smooth, shiny surface, it will peel off in a week. That is the number one reason handmade cake jewelry boxes look sloppy after a few uses. Lightly sand the outside of your container with fine-grit sandpaper. Then wipe it clean with rubbing alcohol. This gives the material something to grip. For metal tins, a thin coat of matte spray primer makes a huge difference. Wait until the primer is completely dry before moving on to painting.
Using Too Much or Too Little Paint
A common mistake is dabbing on thick acrylic paint straight from the tube. That creates visible brush strokes and an uneven texture that ruins the illusion of smooth fondant. Instead, thin your paint with a drop of water or acrylic medium. Apply two or three thin coats, letting each one dry fully. For a realistic fake cake look, choose a warm ivory or pale butter color rather than stark white. Stark white looks like plastic, not dessert. You can always add a tiny drop of yellow or brown to warm it up.
- Use a soft sponge instead of a brush for the base coat. It gives a matte, seamless finish.
- Test the color on scrap paper before committing. Lighting changes how the shade reads.
- Seal the painted surface with a matte varnish after drying so the paint doesn’t chip later.
Overcomplicating the Frosting Texture
You do not need special clay or piping tools to make realistic frosting. Many tutorials suggest using hot glue, but it gets stringy and messy. A simpler method is to use air-dry clay rolled into small balls and pressed onto the lid with the back of a spoon. This gives a piped rosette look without the frustration. Another option is to mix baking soda with white glue until it forms a paste, then spread it with a toothpick for a ruffled buttercream effect. Keep the texture uneven and organic. A perfect swirl looks too factory-made.
Forgetting About Practical Ring Storage
It is easy to focus on the outside and then realize the inside is just an empty box where rings slide around and get tangled. Fix this by adding a small cushion or ring bar. Cut a piece of soft craft foam to fit the base of the container, then cover it with felt or velvet. For earrings, glue a strip of ribbon or lace across the inside of the lid so you can hook studs through it. A jewelry box that cannot actually store jewelry well will sit unused, which defeats the purpose of a heartfelt DIY gift idea.
Ignoring Drying Times Between Layers
Patience is genuinely the hardest part of this craft. When you rush from painting to gluing decorations while layers are still tacky, colors bleed and pieces slide off. Acrylic paint needs at least 30 minutes between coats. Air-dry clay can take 24 hours to cure fully. Hot glue needs to set for a full minute before you attach the next piece. If you try to speed things with a hair dryer, you risk cracking or bubbling. Instead, start the project in the morning and let it sit until the next day before adding the final details. This project is meant to be relaxing, not rushed.
Choosing the Wrong Adhesive for Embellishments
Not all glues work on painted surfaces. School glue will peel off. Super glue can cloud the paint and leave white residues. For lightweight fake fruit, sprinkles, or mini beads, use a thick tacky glue (like Aleene’s Tacky Glue). For heavier resin charms or metal findings, use a two-part epoxy. Always apply adhesive to the decoration, not the base, and press gently. If you squeeze too hard, the piece slides sideways and ruins the spacing. Test your glue on a hidden spot first to be sure it dries clear.
The last mistake people make is gluing decorations directly over the moving parts of the lid. Keep a small gap around the rim so the box opens and closes freely. A cake jewelry box that sticks shut is frustrating to use and likely to break.
Wrapping Up Your DIY Cake Jewelry Box
Once you avoid these common pitfalls, the process becomes genuinely enjoyable. You end up with an aesthetic decor piece that looks like a realistic fake dessert but actually holds your favorite rings and earrings. The best part is that each small mistake teaches you what not
#cakejewelrybox #fakecake #aesthetic #diygiftideas #diyproject
Leave a Comment